
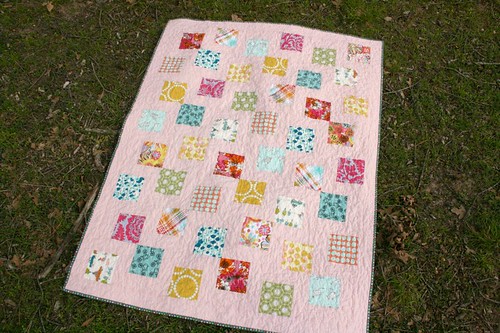
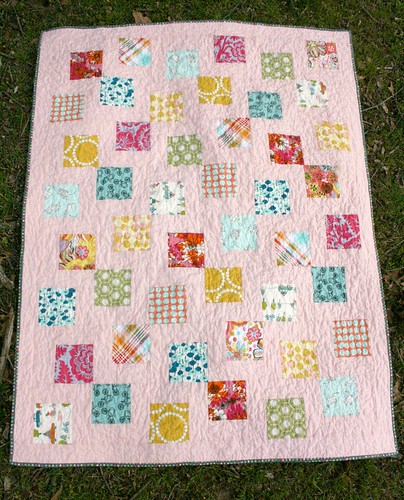
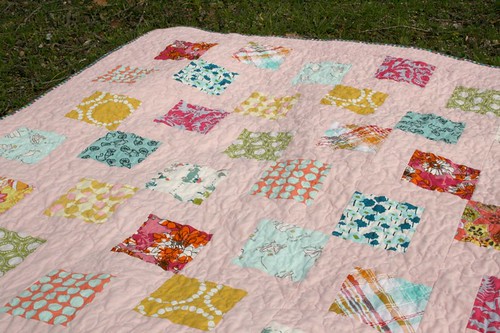
This tutorial gives specifics to make a baby sized quilt (40" by 52") but you can easily adjust to make any size you want.
Fabrics and Cutting
To start, you'll need 12 prints and about 1.5 yards of a solid for the background.
From the prints, cut 12 9"x9" squares (1 square from each fabric if you're using 12 fabrics).
From the background fabric, cut 19 2.5-inch wide strips (2.5" x width of fabric).
- Subcut 6 of the strips into 9" lengths to make 24 2.5"x9" pieces.
- Subcut 8 of the strips into 13" lengths to make 24 2.5"x13" pieces.

Sewing
Sew the short and long strips to your squares like so. Chain piecing makes this go fast!
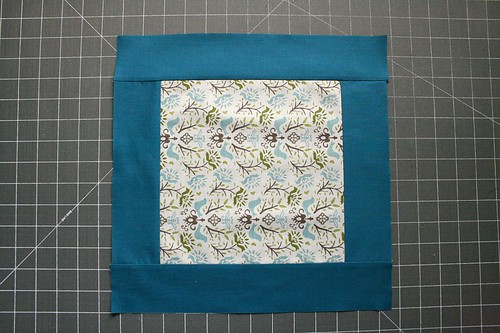
You should then have 12 of these blocks measuring 13" square.
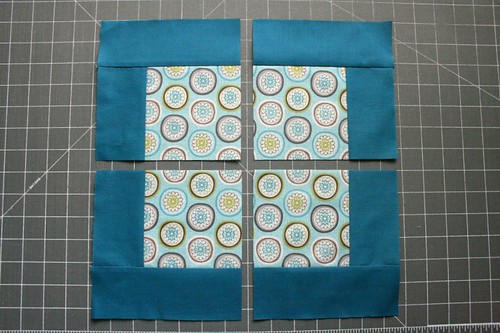
Now, the fun part! Cut your square into quarters so that you have 4 6.5" square blocks.
Arrange them alternating the orientation, 6 blocks wide by 8 blocks tall.

Piece the blocks together row by row.
Finally, add the remaining full length strips to make a border around the whole quilt.
Quilt and bind as desired!
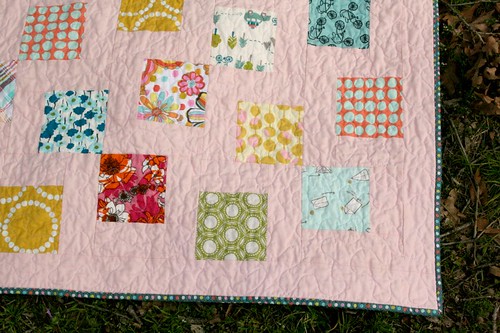
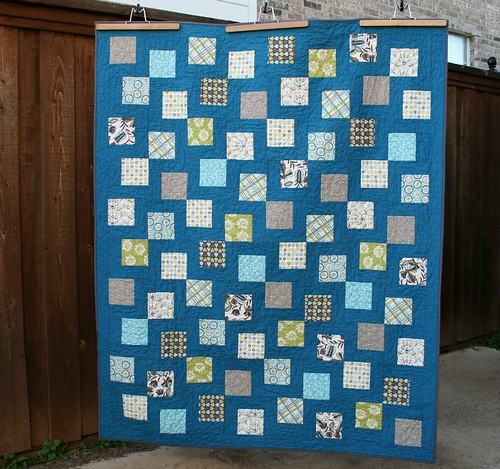
Here's a larger lap size I originally made a year or so ago. I love how the squares look like they are floating. The next version I make I would love to use a collection of "low volume" prints as the background, how fun would that be!

I hope the instructions were clear but please don't hesitate to contact me with questions! As always, you are welcome to use this tutorial to make and sell the finished product on a home-based scale giving credit to this site. Thanks!
15 comments:
Very nice! Thanks for the tutorial!
Thanks so much for the tutorial! Our first baby is (hopefully) coming very soon and this would be a perfect quilt for some eye spy fabrics for tummy time!
Oh, I really like the pattern you get from rearranging the quarters - simple but also a little bit subtle. Great idea - thanks for sharing!!
lovely quilts! thanks for the tutorial.
VERY clever and cute! I have a retreat this weekend at my house and I'm gonna do this one. Maybe I'll do two! Thanks for sharing with us.
I am so hoping to make one of these this summer ; )
Thanks a million for the tutorial. Such an easy idea turning into such an interesting quilt. Really love it and I am sure I will make it as soon as possible.Greetings from Germany
Can't believe I am just now finding out you have a blog. How exciting.
This is great, thanks!
thank you for sharing! This is great.
How beautiful! Love this idea, so creative and unique. The pink is great! I'm a new follower on Facebook, too. You can find me there, too :)
Hi Emily,
Thank you so much for this tutorial. I adapted it for a baby quilt I am making. I don't do blogging so I can't show you a photo of the progress. Suffice to say, I am tickled with the pattern. Thank you SO much for sharing this.
~ Christina in Cleveland
Thanks for the ideas! Making this now and will send you a photo of completed quilt
I love this pattern!! I love the random look of it instead of neat little rows!
Love this pattern! It's the perfect pattern for quilts that need to be made in a hurry! Thank you for sharing this pattern.
Post a Comment